Choosing the right cooler is crucial for a processor's performance and longevity. An All-in-One (AIO) liquid cooler, also known as a processor water cooler, is a popular solution for PC builders who want to combine high cooling performance with a clean aesthetic. However, the market offers an overwhelming variety, and marketing promises can easily lead to a poor purchase. This guide will help you identify the technical pitfalls and make an informed decision.
Common Pitfalls When Buying a PC Water Cooler
Before you invest, you should be aware of three common issues that often lead to disappointment:
- The "Bigger is Better" Fallacy: Many buyers assume that a 360mm AIO or even a 420mm model is automatically the right choice. In practice, such a large radiator won't fit in every case. Failing to properly check case specifications can result in the product being impossible to mount or obstructing airflow within the system. Furthermore, the cooling capacity is often overkill for many mid-range CPUs, leading to unnecessary costs.
- Complex and Incompatible Controls: Synchronising the pump, fans, and RGB water cooling can be complicated. Different connectors (4-pin PWM vs. 3-pin DC), proprietary software ecosystems, and mixing up 5V ARGB with 12V RGB headers are common sources of error. Incorrect wiring can not only lead to suboptimal performance but also permanently damage the LEDs or even components on the motherboard.
- Neglected Voltage Regulator Module (VRM) Cooling: Modern high-end processors, especially when overclocked, place a heavy load on the motherboard's voltage regulators. If these VRMs overheat, the system can become unstable and the CPU may throttle. Many standard AIOs only cool the CPU, ignoring the airflow around the socket that a traditional air cooler often provides.
Key Selection Criteria
To avoid these pitfalls, focus on the following three core parameters.
1. Radiator Size and Case Compatibility
The radiator's size is the most important factor for an AIO's cooling performance. Its surface area determines how much heat can be dissipated into the ambient air.
- 120mm/140mm AIO: Suitable for compact systems (ITX builds) or CPUs with low heat output. Performance is often comparable to mid-range air coolers.
- 240mm AIO: A very common standard that offers a good balance of performance and compatibility. Sufficient for most mid-range and high-end gaming CPUs without extreme overclocking.
- 280mm AIO: Uses two 140mm fans. The larger fan area often allows for quieter cooling at the same performance level compared to a 240mm model, as the fans can spin slower.
- 360mm/420mm AIO: Designed for enthusiasts, overclockers, and users of high-end processors (e.g., Intel Core i9, AMD Ryzen 9). These models offer the highest thermal capacity but also require correspondingly large PC cases.
Before purchasing, always check your case manufacturer's specifications to ensure that the desired radiator can be mounted (at the top, front, or side). Also, consider the total thickness of the radiator including the fans.
2. Socket Compatibility: AIO for AM5 and LGA 1700
A CPU cooler must be mechanically compatible with the motherboard's socket. The current standards for consumer platforms are:
- Intel:LGA 1700 (12th/13th/14th Gen) and its successor LGA 1851.
- AMD:AM5 (Ryzen 7000 series and newer).
Most manufacturers include mounting hardware for all common sockets. Some models, especially for Intel systems, use special "Contact Frames" to optimise the mounting pressure on the processor. This is a response to the elongated shape of modern Intel CPUs. Make sure the required mounting hardware is included or must be purchased separately.
3. Pump, Fan, and Connector Design
The details of the pump and fans determine the efficiency and noise profile.
- Pump: A PWM-controlled pump allows the speed to be adjusted according to the CPU temperature. This ensures quiet CPU cooling at idle and maximum performance under load.
- Fans: Fans with Fluid Dynamic Bearings (FDB) are often more durable and quieter than simple sleeve or ball bearings. High static pressure is important to effectively push air through the dense fins of the radiator.
- Connectors: Look for standardised connectors (4-pin PWM for fans/pump, 3-pin 5V ARGB for lighting) if you prefer control via the motherboard. Models with a water cooler with a display or complex RGB systems often require a proprietary controller and a USB connection to the motherboard.
Solutions For Every Preference
Here are some recommendations tailored to specific user needs and the criteria mentioned above.
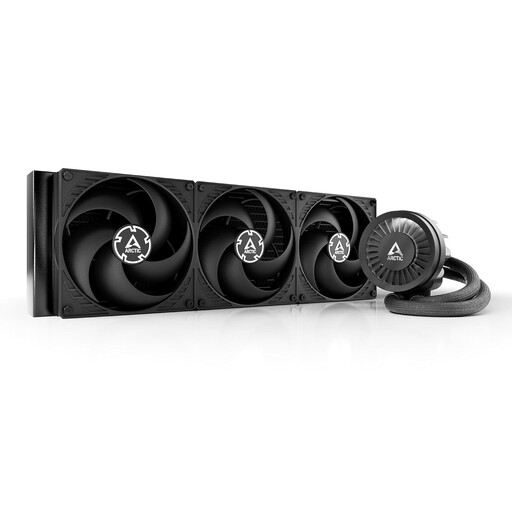
MATCH FOR: MAXIMUM COOLING PERFORMANCE
Why This Fits Their Persona: Ideal for overclockers and users of high-end CPUs who need maximum thermal headroom for sustained load scenarios like rendering or demanding gaming. The 420mm radiator provides an enormous surface area for heat dissipation.
How It Avoids the Trap
Directly addresses the pitfall of neglected VRM cooling with an integrated fan on the pump block that actively cools the voltage regulators, thereby increasing system stability.
Key Advantage & Pros
Large 420mm radiator surface for high heat dissipation; integrated VRM fan to stabilise motherboard components.
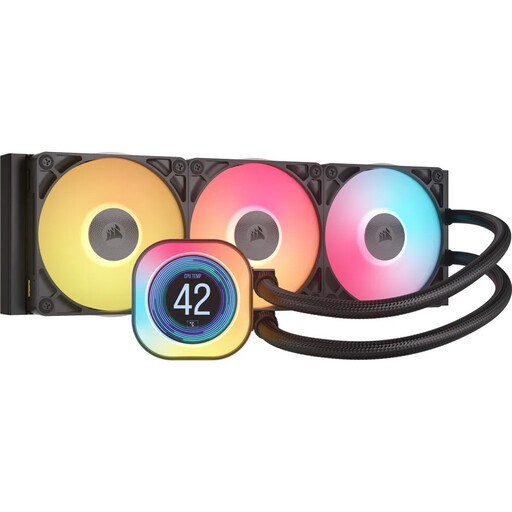
MATCH FOR: AESTHETICS AND CUSTOMISATION
Why This Fits Their Persona: Perfect for PC builders who want to create a visually stunning system with minimal cable clutter. The high-resolution LCD display on the pump head is a central design element.
How It Avoids the Trap
Solves the complex wiring pitfall through the iCUE LINK ecosystem. Fans and the pump connect to a central hub via a single cable type, greatly simplifying installation and synchronisation.
Key Advantage & Pros
High-resolution 2.1" IPS display for showing system data or animations; iCUE LINK ecosystem for greatly simplified cable management.
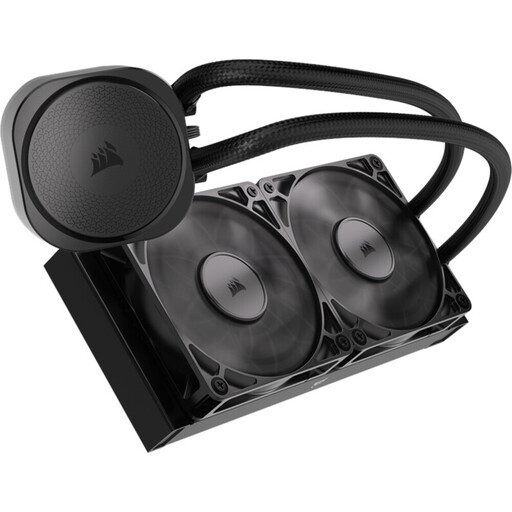
MATCH FOR: BUDGET-CONSCIOUS BUILDERS
Why This Fits Their Persona: Delivers reliable cooling performance without the added cost of RGB lighting. The 240mm size is a solid entry point for effectively cooling mid-range CPUs in most standard cases.
How It Avoids the Trap
Sidesteps the "bigger is better" fallacy with a practical 240mm size that is sufficient for many CPUs and has high case compatibility. The direct motherboard connections also avoid the complexity of proprietary controllers.
Key Advantage & Pros
Focus on pure cooling performance without the RGB premium; simple installation via direct PWM connections to the motherboard.
Looking for more options?
We have compiled a complete, up-to-date list of products that fully meet these strict selection criteria and UK/EU safety regulations.
Frequently Asked Questions (FAQ)
1. How long does an AIO water cooler last?
The lifespan of an AIO is mainly determined by the pump and the gradual loss of liquid through permeation (diffusion through the tubing). Most manufacturers provide a warranty of 3 to 6 years, which is a good indicator of the expected minimum lifespan. On average, you can expect a functional life of 5 to 7 years with normal use before the cooling performance noticeably degrades.
2. Is an AIO water cooler better than an air cooler?
There is no one-size-fits-all answer, as both systems have pros and cons.
- AIO water coolers can often dissipate more heat at a similar size (higher peak thermal performance) and create a clean look around the CPU socket. They transport heat directly to the edge of the case to be exhausted.
- High-end air coolers can compete with many 240mm AIOs in terms of performance, are often quieter at idle, and have fewer potential points of failure (no pump, no liquid). However, they are often very large and heavy. The choice depends on the CPU, case, budget, and aesthetic preferences.
3. What should I pay attention to when installing an AIO?
Correct installation is critical for performance. The most important steps are:
- Radiator Position: Ideally, mount the radiator so that the tubes run downwards or the highest point of the radiator is above the pump head. This prevents air bubbles from collecting in the pump, which can cause noise and damage.
- Mounting Pressure: Tighten the screws on the pump block in a cross pattern and evenly to ensure uniform contact with the CPU. Too much or uneven pressure can damage the processor or motherboard.
- Thermal Paste: Be sure to remove the protective film from the cold plate before mounting. Apply thermal paste if it is not already pre-applied.
- Connecting Cables: Connect the pump connector to the AIO_PUMP or CPU_FAN header on the motherboard and the fans to the appropriate CPU_FAN or CHA_FAN headers.