Flat-lay photographers
If you want to show the whole cheese board from above, look for a suitable angle of view and a practical way to position the camera over the table.


First decide on the framing and shooting distance you want, then look for a compatible interchangeable lens and camera body: a versatile zoom is a different starting point for photographing the whole cheese board than a macro lens for capturing small details. When the light from the window changes, a controllable aperture, suitable stabilisation or a fixed camera position can help. Before buying, check exactly which lens is included and whether it is compatible with the mount.
If you want to show the whole cheese board from above, look for a suitable angle of view and a practical way to position the camera over the table.
For rind, cut surfaces or small garnishes, close-focusing capability and the specific lens are what matter. A camera body on its own doesn’t guarantee macro functionality.
If you’re shooting handheld by the window or in changing light, you’ll need to consider lighting, depth of field and camera shake together.
When photographing cheese boards by the window, consider framing, close-ups and lighting separately, then choose a kit to suit your main subject.
| Buying priority | What to check before buying | Who it matters most to |
|---|---|---|
| Fitting the whole cheese board in the frame | Check the focal length range, sensor format, lens mount and what’s included in the specific kit. | If I want to show the board and its arrangement from above, I need a suitable angle of view and a practical camera position; around 33% of consumers put the overall view first. |
| Capturing small details in sharp focus | Check the minimum focusing distance, magnification ratio and mount compatibility of the specific lens. | If rind, cut surfaces or garnishes are my main subject, what matters to me is how close the lens can focus; around 27% of consumers prioritise close-up details like these. |
| Shooting in changing light from the window | Distinguish between stabilisation in the camera body and stabilisation in the specific included lens; also consider where you’ll position the camera. | If I often shoot handheld in changing light, I want to control camera shake and depth of field together; around 20% of consumers put this priority first. |
| Choosing a complete, compatible kit | Compare the camera body and lens names, the mount and what’s actually included. | If I want to start taking photos straight away, it’s important to me that a compatible lens is actually included; around 20% of consumers prioritise a complete starter kit. |
A camera offer may include the body only, while a kit may come with a lens. Without a compatible lens, the camera isn’t ready to use for the framing you have in mind.
Compare the full model and lens names with the details of what’s included.
According to Canon, the Canon EOS R50 doesn’t have sensor-shift stabilisation; the specific RF-S kit lens examined here has optical stabilisation. Sony documents sensor stabilisation for the α6700, and Fujifilm for the X-S20. These details apply to the models named and don’t replace checking the specific lens combination.
Check the body and lens as a combination rather than relying on a general statement about the brand.
A zoom lens for different framings doesn’t automatically meet the minimum focusing distance and magnification requirements for small details.
Decide on your main subject and check the specifications of the exact lens for close-ups.
For detailed macro shots, you may need an additional macro lens that’s compatible with the mount.
The examples below refer to specific cameras and lenses. For photographing a cheese board, it’s the combination of camera body and compatible lens that matters.
The EOS R50 with an RF-S standard zoom is a documented example of a compact kit for an overall view. Canon treats macro and flat-lay photography as requiring different types of lens.
The Z50II with the NIKKOR Z DX 16–50 mm VR is a documented kit option for different framings. Nikon also lists macro lenses for food photography.
The α6700 is an APS-C camera with an E-mount and documented sensor stabilisation.
The X-S20 offers an X mount and sensor stabilisation as an option for handheld photography.
The Lumix DC-G97 is a Micro Four Thirds option with an interchangeable lens mount. You’ll need to choose a suitable lens separately for the framing you want.
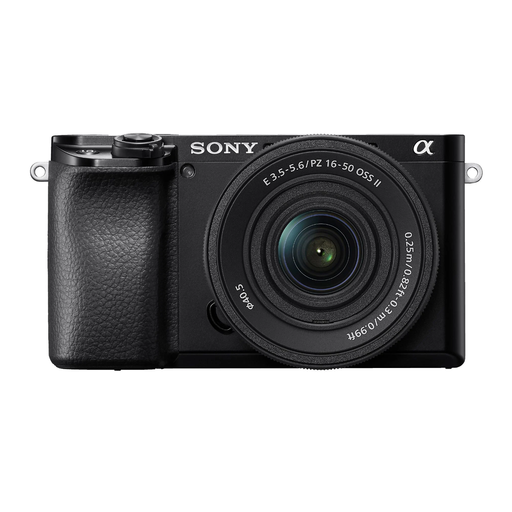
This camera option is suited to overall views and changing framings with a standard zoom.
 No image available
The tilting screen can make it easier to compose shots from a raised camera angle.
The kit is described as an APS-C camera with a 16–50 mm power zoom lens.
No, you don’t necessarily need a macro lens for an overall view. The first thing to consider is an angle of view that suits your shooting distance and framing. Macro becomes especially useful for highly magnified shots of small details.
Side-on daylight is one possible starting point. If the shadows are harsh, you can soften the light or try using a piece of white card opposite the window as a reflector. The effect will vary with the size of the window, the weather and the time of day. Nikon Germany describes side-on daylight as suitable for food photography.
Not necessarily. First check whether stabilisation is actually available in the camera body or lens you’ve chosen. It helps counter camera movement, but you’ll also need to consider the aperture and available light to achieve the depth of field you want.
For eligible distance purchases, the European Union’s Your Europe information portal states that you generally have 14 days from delivery to cancel. If goods are faulty, you have a legal guarantee of at least two years against the seller; this is separate from any voluntary manufacturer’s guarantee. Check whether the seller is a trader, as purchases from private individuals aren’t covered by the right to cancel in the same way.