
Lieferung heute & morgen

Qualitätsgarantie

Willkommens-Angebote freischalten: KOSTENLOSE Lieferung | Bis zu 80 % RABATT | Kostenlose 30-Tage-JoyPlus-Testphase
App herunterladen
By Joybuy Product Recommendation Officer, 22 July 2026
Shampoo bottles, shower gels, and scrubs cluttered on the edge of the shower tray or on the floor not only create a mess but can also pose a slipping hazard. A drill-free shower caddy is a practical and hassle-free solution to create order without damaging tiles or walls. This makes it an attractive option, especially for renters or anyone who prefers a flexible home setup.
This guide introduces various mounting types and materials and presents a selection of models to help you choose the perfect bathroom organiser.
Before you decide on a model, there are a few criteria to consider. The right choice depends on the conditions in your bathroom and your personal needs.
The installation method is the defining feature of a drill-free shower caddy. The two most common systems are adhesive and suction cups.
The material affects not only the look but also the durability and maintenance of the shower caddy.
Consider how much storage space you need and where the caddy will be placed.
Here is a selection of shower caddies that meet different requirements for design, material, and installation.
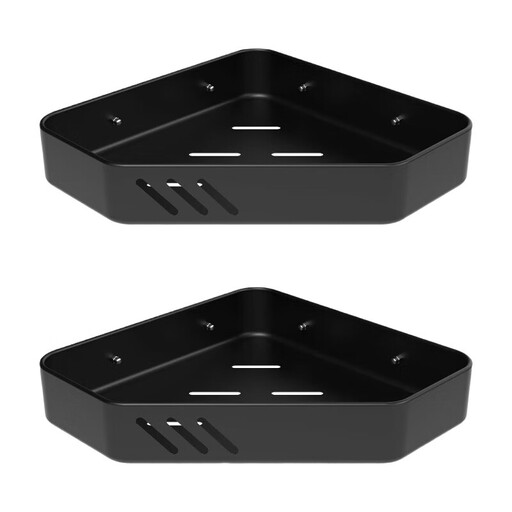
Why It Stands Out This set consists of two separate corner shelves, allowing for a flexible arrangement in the shower. Its standout feature is the dual installation option: the shelves can either be mounted without drilling using the included adhesive kit or traditionally screwed in for even greater stability. The design, made of coated stainless steel in black, looks modern and is built for durability.
Advantages
Who It's For Ideal for users looking for a durable and stylish corner storage solution. The black finish pairs well with modern bathroom fixtures. The option to choose between adhesive and drilling provides extra security and flexibility.
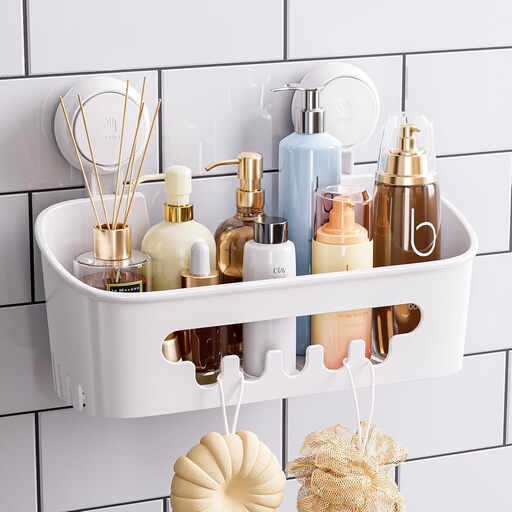
Why It Stands Out This no-drill bathroom shelf features a patented suction cup technology that allows for installation in seconds. According to the manufacturer, the suction cups can hold a weight of up to 10 kg (22 lbs). The caddy can be removed and repositioned at any time without leaving residue, making it a highly flexible solution.
Advantages
Who It's For Perfect for renters and anyone looking for a simple, non-permanent solution. It requires an absolutely smooth, non-porous surface such as glass, acrylic, or high-gloss tiles.
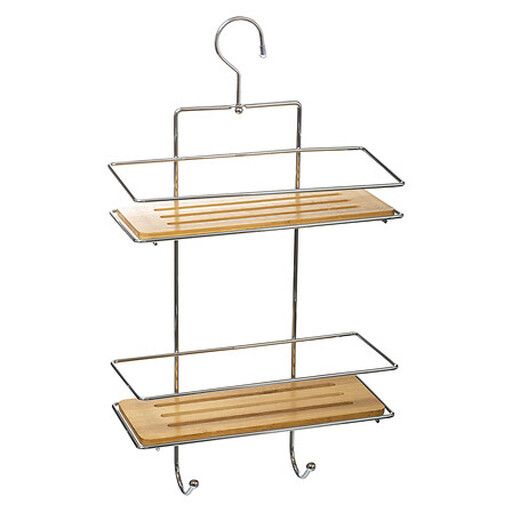
Why It Stands Out This two-tier shower shelf combines the natural warmth of bamboo with the stability of metal. It is often designed as a hanging caddy that simply hooks over the shower fixture or shower door, thus also requiring no drilling. The two-level design creates ample storage space for various bathroom essentials.
Advantages
Who It's For Suitable for design-conscious users who prefer natural materials and are looking for a flexible hanging solution. It is important to let the bamboo dry regularly to maintain the quality of the material over the long term.
If our selection doesn't include the perfect model for your bathroom, you can find more solutions in our broader collection. Whether you need different sizes, materials, or designs, there's a perfect helper for every requirement.
Discover our entire range of Shampoo and Shower Organisers here.
1. How much weight can a drill-free shower caddy hold? The weight capacity varies depending on the model and mounting type. Adhesive caddies often hold between 5 and 10 kg. Suction cup systems can achieve similar values, but their holding power is highly dependent on the condition of the wall surface. It is essential to check and not exceed the manufacturer's specific guidelines.
2. On which surfaces does an adhesive shower caddy stick? Adhesive mounts work best on smooth, clean, and non-porous surfaces. These include tiles, glass, metal, marble, or acrylic. They are generally not suitable for rough surfaces, wallpaper, or painted walls, as the adhesive cannot create a sufficient bond.
3. How can an adhesive shower caddy be removed? In most cases, the adhesive can be softened by heating it with a hairdryer. The caddy can then be carefully pried off the wall, for example, with a thin scraper or a piece of dental floss. Any remaining adhesive residue can then be removed with a suitable cleaning agent. Always follow the manufacturer's instructions to avoid damaging the wall.