What should you look for when buying?
It’s not just the light’s technical specifications that matter. Light positioning, colour balance, consistency and the space available all help determine whether a panel is right for your shot.
Indirect window light and reflector
Choose this when: You shoot during the day and only want to brighten the shadow side slightly. Start with a white card opposite the window.
Things to consider: It’s a simple setup, but the light’s brightness and colour will change with the shooting conditions.
Dimmable LED panel
Choose this when: You want to control shadows precisely or create a similar level of fill light in changing daylight. A repositionable panel with suitable diffusion can give you more control over the lighting.
Things to consider: The panel, mount and any light modifiers need space and a suitable power supply. Strong frontal fill can also soften the texture you can see.
| Priority |
What to check when buying |
Who is this important to? |
| Shadows and texture |
Check that the light can be repositioned and dimmed, and that a diffuser or reflector will work with your setup. |
If I want side lighting to bring out the shape of the pasta but avoid harsh shadows, I’d adjust the fill carefully. Around 36% of consumers put shadow shape and visible texture first. |
| Colour and white balance |
Check the adjustable colour temperature and documented colour-rendering information for the exact model. Check your finished setup against a neutral reference. |
When daylight and artificial light change, I want the pasta and white background to look true to colour. Around 29% of consumers prioritise colour rendering and white balance. |
| Consistent results |
Check whether brightness and colour temperature are adjustable, and whether the power supply is suitable for longer shooting sessions. |
If I photograph pasta repeatedly in changing conditions, I want to be able to adjust the lighting precisely. Around 21% of consumers put repeatable settings first. |
| Space and power |
Check the dimensions, mounting options, what’s included and the power supply. Only factor in suitable batteries if you’ll be shooting away from a mains supply. |
With a small shooting table, I want to fit the light, mount and modifiers safely. Around 14% of consumers prioritise space requirements and power supply. |
Joybuy options for small product photography
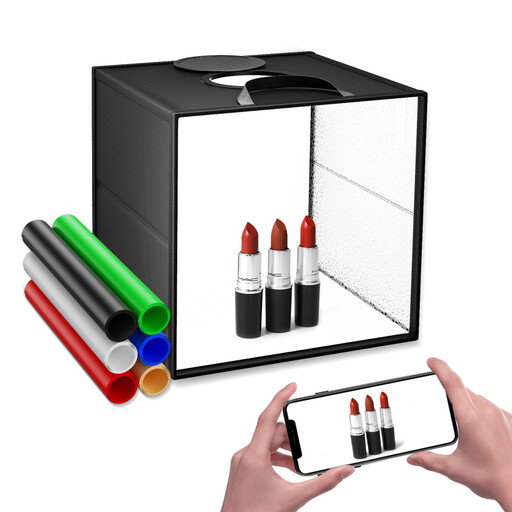
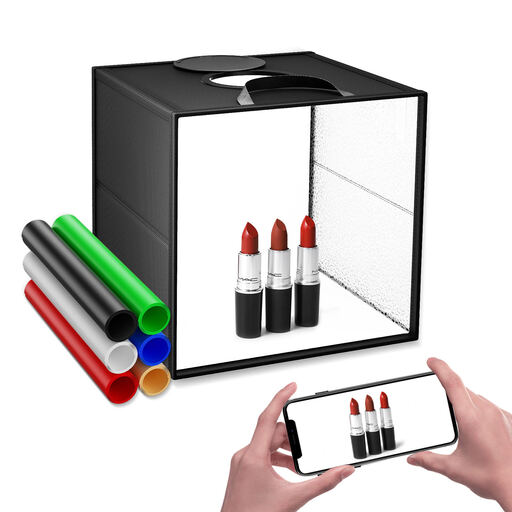
The options below are foldable light boxes for small product photography. They’re an alternative for a compact tabletop setup, but they aren’t standalone LED panel lights.
 No image available
Foldable LED light box, 30 cm, 120 LEDs
For small product subjects on a cramped table. It’s a light box, not a separate LED panel.
The product description lists three colour temperatures and nine dimming levels. It also mentions six background colours, including white.
Joybuy
 No image available
Mini photo studio light tent, 40 cm, 5600K
For product photography with a light tent and interchangeable backgrounds. It isn’t a standalone panel light.
The product description lists dimmable 120 LEDs at 5600K, six background colours and soft light cloths.
Joybuy
Frequently asked questions
Do I definitely need an LED panel to photograph fresh pasta against a white background?
No. Start by trying indirect window light and a white card to brighten the shadows. An adjustable panel is most useful if you want to change the shadows precisely or shoot at different times of day.
How can I stop the white surface looking yellow or green?
Set the white balance to match the light actually falling on your setup, then check a neutral surface in a test shot. Setting the light’s colour temperature in Kelvin won’t replace this step.
How should I set up a panel near food?
Mount the panel securely according to its instructions and keep cables out of your work area. For the PavoSlim 60B, Nanlite specifically requires a dry, well-ventilated location with the vents unobstructed. Follow the safety instructions for the exact model.
Are a battery, stand and light modifiers always included?
No, it depends on the variant on offer. For the NEEWER RGB660 PRO II single panel described here, NEEWER lists a mains adapter and diffuser, but doesn’t include NP-F batteries or a stand. Check the contents for the exact variant.
Does a CE mark prove good colour rendering?
No. The European Union explains that CE marking is only required for products where the relevant EU rules explicitly call for it. It isn’t an independent test of photographic lighting quality. For a specific panel, check separately which rules apply and what technical colour specifications are available.


