Detail filming at a small desk
If you’re mainly filming the solder joint and your hands, you’ll want a suitable mounting option and a light that’s easy to put away after filming.


For close-up shots of the solder joint and your hands, a small light that’s easy to position could be a good fit. For a larger work surface, a separately positioned panel with diffusion may be more suitable. The key is to check a test shot using your actual framing, secure the light well away from the soldering iron, and test it with your camera and dimmer settings. Manufacturer figures for brightness, colour rendering and flicker don’t replace your own test.
If you’re mainly filming the solder joint and your hands, you’ll want a suitable mounting option and a light that’s easy to put away after filming.
If you want the circuit board, tools and hand movements all in shot, check how the light is distributed and whether you have room to set everything up.
If the ambient light changes, check for colour casts and possible banding using your own camera and planned settings.
Start with your framing and available desk space, then check your camera settings, power supply and what’s included.
| Consideration | What to check | Who is this important for? |
|---|---|---|
| Shadows on the solder joint | Move your hands in a test shot; check the diffuser and position the light to the side. | If I want to show the solder joint and my hands at the same time, I’ll check whether my hand or a tool casts a shadow over important details. Around 33% of consumers place most importance on even lighting. |
| Mounting when space is limited | Check the footprint, mount, range of movement and cable routing with your own setup. | If my camera, soldering iron stand and cables are already taking up space, I need a mount that won’t get in the way of my work area. Around 27% of consumers prioritise secure mounting in a confined space. |
| Camera image and colours | Set the white balance; review test clips at your planned frame rate and dimmer level. | If the room lighting changes, I want to spot colour casts and banding in my own video rather than relying on specifications alone. Around 20% of consumers prioritise compatibility with their camera and colour settings. |
| Power and accessories | Check the power supply, recording time and included items for the exact variant. | If I’m recording a longer demonstration, the power supply needs to suit the duration and setup, and any accessories I need must be included. Around 20% of consumers put power and equipment first. |
A figure measured at 0.5 m doesn’t describe the same conditions as one measured at 1 m. Neither figure guarantees even lighting across your work surface.
Only compare brightness figures taken under the same conditions, and check the whole scene in a test shot.
A compact mounting setup won’t necessarily light your hands, circuit board and solder joint evenly.
Before choosing a light, decide whether you want to show just the solder joint or your hands and circuit board at the same time.
A tripod, power supply or battery may or may not be included, depending on the model and variant.
Before buying, check what’s included with the exact version on offer.
These examples refer to specific product ranges. Check the features and included items for the model you’re considering.
Desk lights and larger bi-colour panels, including the LUMIS Key Light 28555 and LUMIS LED Panel Bi-Color 28573.
Compact camera lights for close-up detail shots, such as the P96 3286B.
Larger panel kits with a diffuser and a choice of power options, such as the RGB660 PRO II.
Positionable panels that support light modifiers, such as the P60x.
Larger bi-colour panels with a diffuser and several power options, including the P260C Pro.
Joybuy’s selection of compact LED video lights for close-up detail shots at a small desk.
 No image available
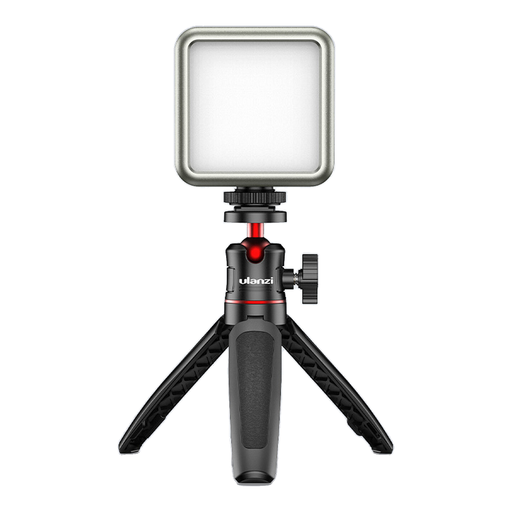
According to the product name, this compact video light is designed for macro shots and product photography. It’s listed as having a 2000 mAh battery, dimmable 2500K–9500K light and magnets on the back.
Check whether you can attach the light securely to your setup and whether the details for the specific variant suit your needs. Before buying, also check the documentation and requirements that apply to the product in question.
Start by positioning the light to the side, above the frame, then record a test clip of the actual steps you’ll be filming. If shadows hide important details, try diffusion or a lower-powered fill light from the other side. This is a lighting technique, not a guarantee for any particular panel.
No. The German Social Accident Insurance advises you not to breathe in solder fumes, to keep your distance and to ensure good ventilation. It also recommends using a soldering iron stand and being aware of where the iron’s cable is. Position the light and cables so they don’t interfere with these precautions.
Check the included items and power supply against the exact model variant and your planned recording time. SmallRig lists a built-in battery for the P96; Rollei’s optional batteries for the LUMIS LED Panel Bi-Color aren’t included. Keep the light, cables and connectors away from the hot work area, and follow the device instructions.
CE marking is required when the EU harmonisation rules that apply to the specific product say it is. The Federal Network Agency lists lighting as a product group it monitors and identifies CE marking, product identification, manufacturer details, German-language instructions and a declaration of conformity among the areas it checks. A product description alone doesn’t confirm that a particular offer complies.
If an electrical device carries the relevant marking, don’t dispose of it with unsorted waste; use separate collection instead. The European Union explains that the crossed-out wheeled bin symbol indicates that electrical and electronic equipment must be collected separately.