Digitising the whole print
If you’re photographing the entire linocut, make sure the brightness stays even right out to the edges of the paper. The National Museum of Women in the Arts recommends lighting flat artwork from two sides.


To photograph an entire linocut print, start by planning for the most even lighting possible, ideally using two lights that can be positioned at the sides. A compact rechargeable light is easier to fit into a tight space, but it won’t necessarily light the whole print evenly. If you’re working with glossy ink or glass, check the light positions for reflections too.
If you’re photographing the entire linocut, make sure the brightness stays even right out to the edges of the paper. The National Museum of Women in the Arts recommends lighting flat artwork from two sides.
If you want the colours in your photo to look as close to the original as possible, compare model-specific colour rendering figures and plan to set the white balance carefully. ERCO explains that colour rendering depends on the spectral composition of the light, not just its colour temperature.
If you have limited space on your table or sometimes take photos without access to a mains socket, check the mount and power supply alongside the size of the area being lit. Manufacturers’ figures for small lights apply at specific distances and don’t automatically prove that the whole print will be lit evenly.
First, check whether one or two lights can illuminate your print evenly. Then choose the light quality, positioning and power supply to suit your photography space.
For consumers in Germany choosing LED lighting for linocut photography, the main considerations can be broadly grouped as follows:
| Priority | What to check when buying | Who is this especially important to? |
|---|---|---|
| Even lighting | Print size and possible positions for two lights; check the brightness in all four corners using a test shot. | I want the whole print to look evenly lit, so that variations in lighting aren’t mistaken for variations in the print. That’s why around 33% of consumers put lighting the entire area first. |
| Colour rendering | Model-specific CRI figure and matching light colour across the lights you use; plan to use a neutral reference for white or grey balance. | If accurate paper and ink colours matter to me, I want to match the light colour and white balance in my actual setup. That’s why around 27% of consumers prioritise colour rendering. |
| Avoiding reflections | Consider the surface and any glass in a frame; test an adjustable position or diffuser in a sample image. | With glossy ink or glass, I want to avoid distracting reflections without losing sight of how evenly the area is lit. That’s why around 20% of consumers pay particular attention to reflection control. |
| Space and power supply | Check the mount and tripod option, as well as the mains adaptor or batteries required for the specific kit. | If my photography space is tight or there’s no socket nearby, I need to be able to position and power the light appropriately. That’s why around 13% of consumers prioritise a compact setup. |
| Banding | Take test shots using the planned brightness and shutter settings; adjust the camera settings if you see banding. | If my photos show bands under LED lighting, I want to test the light and camera together before relying on the shot. That’s why around 7% of consumers prioritise avoiding visible banding. |
An illuminance figure may apply to a particular distance and light colour. On its own, it doesn’t tell you whether the whole print will be lit evenly.
Compare illuminance figures only under the stated measurement conditions, and check all four corners of your subject in a test shot.
Depending on the results, you may need a second light or additional diffusion for your setup.
Colour temperature describes the colour of the light; it doesn’t determine colour rendering on its own. A suitable panel setting won’t automatically set your camera’s white balance either.
Look for model-specific colour rendering figures and take a reference shot under the lights you’ll actually be using.
Tripods and power supplies vary by model and kit. The NEEWER NL660 is available in a version with a tripod; according to the manufacturer, NP-F batteries are not included.
Before buying, compare the full contents of the box with your planned setup and the side lighting positions you need.
Depending on the kit, you may need to buy a tripod or suitable batteries separately.
The LEDP260C is a larger bi-colour panel designed for a fixed setup. The specifications apply to this model and shouldn’t be confused with those of the differently named P260C Pro.
The NL660 is a tilting bi-colour panel; the manufacturer offers versions with and without a tripod.
The P60x is a directional bi-colour panel with a separate softbox, suited to setups where you want to shape the light and work in a fixed position.
The P96 is a small, camera-mountable bi-colour light for tight setups or close-up shots.
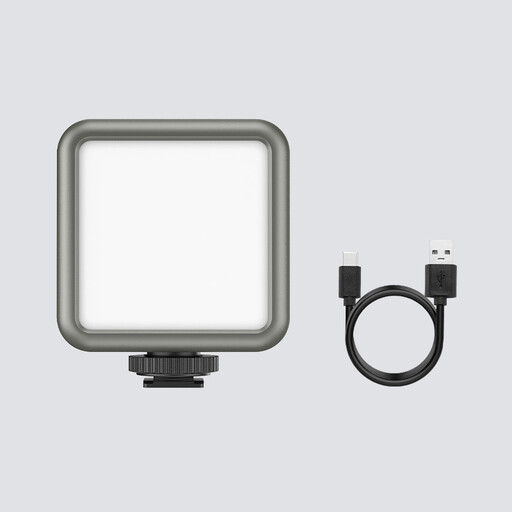
The VL81 is a compact, battery-powered supplementary light with a hot shoe mount and thread for small setups.
This selection includes a compact, battery-powered LED photography light for tight or mobile setups. If you’re photographing an entire print, check the lighting in all four corners separately.
 No image available
For a tight or mobile setup. If you’re photographing an entire linocut, check that the area is lit evenly in a test shot.
RGB, dimmable, adjustable colour temperature from 2500K–9500K, 2000-mAh battery and rear magnets. Check the documentation for the specific version on offer before buying.
Start with two lights at the sides of the print, at roughly 45°, and keep the camera parallel to the print surface. Compare the brightness in the corners. If you see reflections, adjust the light positions first, then check the evenness again.
No, colour temperature alone isn’t enough. Match the lights to one another in your actual setup and use a suitable neutral reference for white or grey balance.
Try a different shutter speed and, if your camera has one, its anti-flicker setting. The right setting depends on the camera and light, so check the result in a test photo.
It depends on the model and kit version. For the NEEWER NL660, the manufacturer offers versions with and without a tripod; NP-F batteries aren’t included. For the Godox LEDP260C, the manual specifies a mains adaptor and batteries that must be bought separately. Always check what’s included with the specific version.
Electrical products must meet the relevant EU requirements. CE marking is required where the harmonised rules applicable to the specific product call for it. Check the documentation for the exact model version on offer. A CE marking doesn’t confirm the panel’s light quality.