Photographing larger model railway scenes
If you’re photographing the landscape, tracks and a plain backdrop together, choose a light source and position that let you control shadows across the whole composition.


For larger model railway scenes that you want to light consistently alongside a plain backdrop, a repositionable panel with diffused light is a natural choice. The size of the light source and the setup matter more than wattage alone. For small, static subjects, existing diffused light and a camera tripod may be enough. An adjustable bi-colour panel helps you fine-tune the light, but it needs space and may require extra accessories, depending on the version.
If you’re photographing the landscape, tracks and a plain backdrop together, choose a light source and position that let you control shadows across the whole composition.
If you’re documenting colours and details across several shots, you can deliberately match the panel’s colour temperature to your camera’s white balance.
If you’re photographing small sections on a table, you’ll need to fit the light, mount, camera and backdrop into a compact space. So check the space required for the entire setup, not just the size of the light head.
| What you’re looking for | What to check | Who it matters to |
|---|---|---|
| Lighting the scene and backdrop | Check the size of the frame, the light or diffuser surface and how easily it can be repositioned; assess shadows in a test shot. | If I’m photographing tracks, landscape and backdrop together, I want to assess the lighting across the whole setup. This is the main consideration for around 36% of consumers. |
| Keeping colours consistent | Check the adjustable white-light range and the colour rendering information for the specific model; set the camera’s white balance to suit the planned lighting. | If I’m comparing several detail shots, I want to reproduce colours reliably and set the white balance deliberately. Around 29% of consumers put colour consistency first. |
| Saving space and positioning the light | Consider the dimensions of the light head, the mounting method, the space needed for the stand and the cable routing. | If I’m photographing a small section on a table, the entire setup needs to fit alongside the camera and backdrop. This is the main consideration for around 21% of consumers. |
| Checking power and accessories | Check what’s included with the specific version, as well as the compatible power adapter, stand, battery and, if needed, charger. | If I want to set up and use the panel straight away, I need to know in advance which parts I’ll need. Around 14% of consumers prioritise having everything they need for a complete setup. |
A brightness reading taken under specific conditions doesn’t automatically describe how evenly light will fall across the landscape and backdrop.
Only compare measurements taken under the same conditions, and check the area you need to photograph with a test shot.
The NEEWER NL660 versions differ in whether they include a stand; according to the manufacturer, NP-F batteries aren’t included.
Check the contents of your chosen version against your mounting and power requirements.
The light’s colour temperature affects how the camera sees colours, even when the panel is adjustable.
Match the panel and camera, then check the colours in a test shot before taking several pictures.
The NL660 is a larger bi-colour panel designed for a repositionable setup.
According to Rollei, the LUMIS LED Panel Bi-Color is a 35 × 24 cm white-light panel for setups with space beside the scene.
The Godox manual lists the LEDP260C for uses including macro and product photography.
The PavoSlim 60B is a slim bi-colour panel with light modifiers for a more precisely controlled setup.
The P60x combines a bi-colour panel with accessories for more controlled lighting.
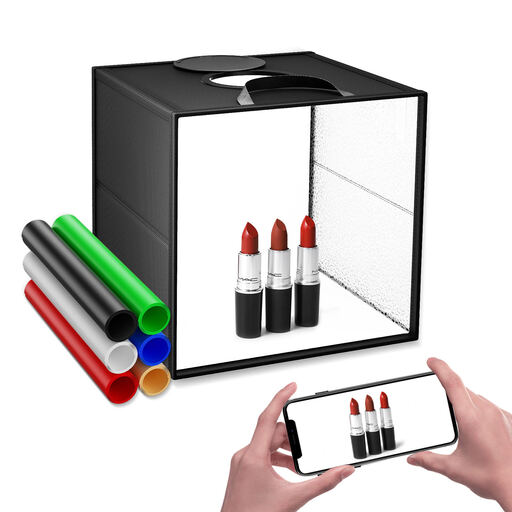
For small subjects that fit inside a compact photo box; the product below is a photography setup with built-in lighting, not a standalone LED panel.
 No image available
Suitable for small model railway subjects, provided the scene and backdrop fit inside the 40 cm photo box; this is a photo box, not a standalone LED panel.
120 dimmable LEDs; three colour temperature modes from 3,000 to 5,600 K.
Foldable, with six coloured backdrops and soft light-diffusing cloths; openings at the front and top.
No. If you have enough diffused light, you can start with a sturdy camera tripod and a test shot. A panel is useful when you want more control over the light’s position and brightness, or need to repeat the setup.
Choose a backdrop that contrasts clearly with the subject, and extend it behind the scene without a visible edge if possible. Matte materials can help reduce unwanted reflections; then check the shadows and brightness in a test shot.
Keep the lighting and camera white balance as consistent as possible, and check the colours in a test shot. An adjustable panel colour temperature helps you fine-tune the light, but it won’t correct an unsuitable white balance by itself.
Check the exact kit version: the NEEWER NL660 includes a power adapter, but compatible NP-F batteries aren’t included. Keep the ventilation openings clear on a ventilated panel such as the Nanlite PavoSlim 60B, and follow the manufacturer’s maintenance instructions.
CE marking is required for products covered by relevant harmonised EU rules that require it; it isn’t an approval from a central EU body. Your statutory rights against the seller are separate from any voluntary guarantee. Old electrical equipment should be taken to an appropriate separate collection point, not put in household waste.