If window light already illuminates your notebook well enough, start with a white reflector. For consistent shots regardless of daylight, a dimmable white-light panel that you can position where needed is a good option. Diffusion can soften harsh shadows and reflections, while side lighting can bring out embossing and stitching. Check the effect on your own notebook and keep the white balance consistent – a larger or more powerful panel isn’t automatically the better choice.
Which setup is right for you?
Notebook sellers who care about colour
If you’re photographing several cover or paper colours for a product listing, controlled lighting and a consistent white balance will help you produce comparable images. Adobe explains that different light colours affect how colours appear.
Bookbinders showcasing texture
If you want to show embossing, stitching or the paper’s surface, consider whether soft, even light or carefully directed side lighting will work better for your subject. Adobe explains that direct, harsh light can create stronger shadows and bright spots.
Photographers working at a small table
On a compact photography table, you’ll need space for your notebook, camera and light, including its mount. So check that the panel size, mounting options, power supply and accessories included suit your setup.
What should you look for when buying?
First, see whether window light and a white reflector are enough. A panel is more worthwhile if you want lighting you can repeat independently of daylight. Adobe explains that light colour affects how colours appear, while diffused light can soften harsh shadows.
Window light with a white reflector
A good choice if: you take photos in the same place during the day and simply want to brighten a book page that’s too dark.
Things to consider: changing daylight is harder to control consistently. Test your setup to check that the dark background stays dark.
Dimmable bi-colour panel with diffusion
A good choice if: you want to light paper and covers consistently, even when the ambient light changes.
Things to consider: diffusion can make embossing less pronounced. Check the panel size, light modifier, mounting options and power supply together.
RGB panel
A good choice if: you’re planning colourful, mood-led shots as well as neutral product photos.
Things to consider: coloured lighting changes how product colours appear. For accurate-looking paper and cover colours, use the white-light setting.
| Priority |
What to check before buying |
Who it matters to |
| Paper and cover colour |
Check the white-light adjustment range and the colour-rendering information for the specific model; keep the white balance consistent throughout a series of photos. |
If I want to show paper and cover colours as accurately as possible in product photos, controllable white light is a priority. Around 25% of consumers put colour rendering first. |
| Light direction and book texture |
Check whether it comes with a diffuser or softbox and whether you can angle the light from the side; compare test shots using your own notebook. |
If I want embossing, stitching or paper texture to remain visible, I need to balance soft light against carefully placed shadows. Around 33% of consumers prioritise light direction. |
| Space and positioning on the photography table |
Check the footprint, mounting point and swivel range against the space needed for your camera and notebook. |
At a small table, I want to position the light without losing space for the book and camera. Around 25% of consumers prioritise space and mounting. |
| Power supply and accessories |
For the specific version, check separately whether a power adapter, battery compatibility, batteries and mount are included. |
If there isn’t always a suitable socket where I’m taking photos, or I want to avoid buying extra accessories, a complete setup with compatible components matters. Around 17% of consumers first look for flexible power options and included accessories. |
Avoiding common buying mistakes
-
Assuming a high CRI means product photos will show true-to-life colours
CRI figures come from the manufacturer, and the white balance and any mixed lighting also affect the shot. A figure on a spec sheet alone won’t tell you how your paper and cover will look in your planned setup.
Compare a test shot using your actual paper, and keep the white balance consistent throughout the series.
-
Assuming a diffuser is the answer for every shot
Soft light can reduce harsh shadows and bright spots. More directional light, on the other hand, can show the texture of embossed details more clearly.
If you need both, plan separate overview and close-up shots, then compare how the light looks on your notebook.
-
Assuming the power adapter, stand and battery are included
What’s included varies by model and version. A single panel may not come with a stand or compatible batteries.
Before ordering, check the specific version against the manufacturer’s details for the power adapter, mount, light modifiers and batteries.
Depending on the version you choose, you may need to budget separately for a mount or compatible batteries.
Key brands at a glance
Godox
The P260C Pro is a bi-colour panel for buyers comparing adjustable white light and different power options.
- For the P260C Pro specifically, Godox lists a colour temperature range of 2800–6500 K, an average CRI of at least 98 and a built-in diffuser.
- These are the manufacturer’s specifications, not independent confirmation of how colours will render when photographing a notebook. The P260C Pro is not the same as the differently named LEDP260C.
amaran
According to the manufacturer, the P60x comes with a softbox, grid and power adapter.
- amaran lists a colour temperature range of 3200–6500 K and a CRI of at least 95 for the P60x.
- A light stand isn’t included in the listed contents for the single-panel version. The quoted lux values aren’t a direct comparison of how well the panel lights a notebook.
NEEWER
The RGB660 PRO II combines adjustable white light with RGB features for additional colourful shots.
- The European product page lists a diffuser, an included power adapter and optional operation with NP-F batteries. NEEWER states a CRI of 97+.
- Batteries and a stand aren’t included with the single panel described. RGB lighting isn’t a substitute for neutral light when you want product colours to look accurate.
Nanlite
According to the manual, the PavoSlim 60B is a bi-colour panel supplied with a softbox, diffuser and grid.
- The manual lists a colour temperature range of 2700–6500 K and an average CRI of 95.
- For the model covered by the manual, Nanlite specifies a dry, well-ventilated setup with the vents unobstructed. This requirement shouldn’t automatically be applied to other panels.
Light tents for your notebook photography table
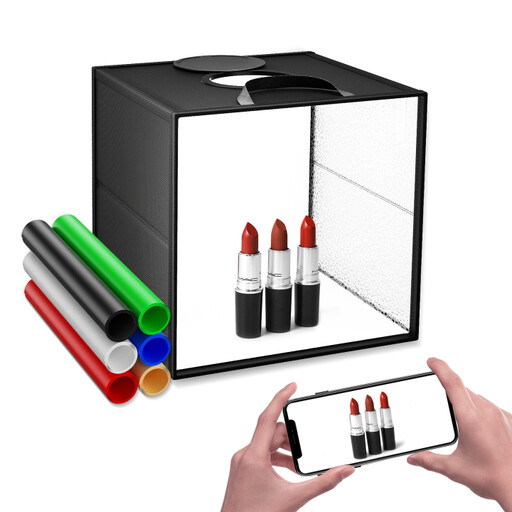
These are compact light tents with integrated lighting, not standalone LED panels. If you’re photographing an open notebook, check that the shooting area is large enough for your subject.
 No image available
Foldable 30 × 30 cm light tent with dimmable lighting
The compact, foldable design could suit product photography on a table, as long as the usable area is large enough for your notebook.
The stated size is 30 × 30 cm. According to the product description, the tent has two openings, dimmable lighting and an integrated diffusion system.
For larger or open notebooks, the shooting area may limit what you can fit in the frame.
View at Joybuy
 No image available
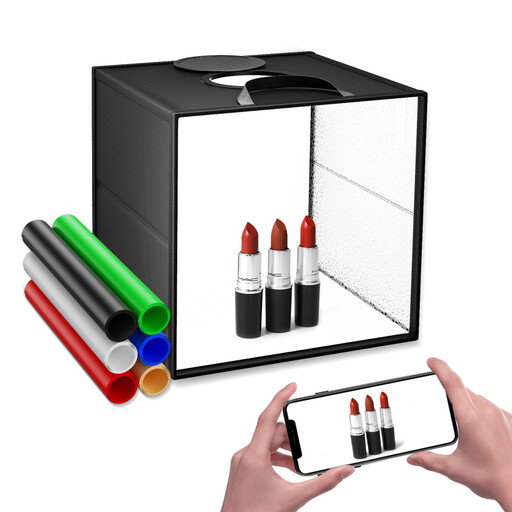
Foldable LED light tent, 30 cm, 120 LEDs
This foldable light tent could be suitable for small product shots on a compact table. Check the usable area with your notebook open.
It’s listed as having 120 LEDs, three colour temperatures and nine brightness settings. The set includes six background colours, including black.
The 30 cm light tent is designed for small still-life subjects. For larger or open notebooks, the usable area may be a consideration.
View at Joybuy
Frequently asked questions
How do I get started with just one light source against a dark background?
Start by directing the available window light onto the notebook. If the opposite side looks too dark, try using white card as a reflector. For a setup that’s less dependent on daylight, try positioning a dimmable panel to the side of the book. Check both the edges of the book and the background in your test shot.
Do I need to keep changing the colour temperature while taking photos?
No, not necessarily. For a consistent series of shots, keep the lighting and white balance under control. Adjustable colour temperature can help if you can’t switch off the ambient light.
What should I bear in mind when setting up and cleaning the panel?
Follow the instructions for the specific panel. For example, the Nanlite PavoSlim 60B manual specifies a dry, ventilated location, unobstructed vents and cleaning without harsh cleaning products. These model-specific requirements don’t automatically apply to all LED panels.
Who can help if a panel bought online is faulty?
For a consumer purchase in Germany, your statutory rights against the seller are separate from any voluntary guarantee. If there’s a fault, the first step may be to request a remedy, such as a repair or replacement. Goods bought online are also generally covered by a 14-day right of withdrawal; the conditions for your individual case should be checked.
What labelling and disposal rules apply in Germany?
CE marking is required for products when the relevant harmonised EU rules expressly require it; it isn’t an independent quality mark. Electrical and electronic waste must be collected separately, not put in household waste. The stiftung ear explains the registration requirements for those placing electrical equipment on the market in Germany; this doesn’t mean ordinary buyers have to register under WEEE themselves.


