Oval racing beginners without a dedicated rig
If you’re practising repeated throttle and brake inputs, first check whether the pedals and seat stay in place as you brake.


Choose a pedal set that’s compatible with your PC or specific wheel base, and that stays firmly in place with your seat when you apply your intended braking force. For repeated oval practice, both a position-based brake and an adjustable load-cell brake are options; the latter needs suitable support. A single monitor doesn’t change the pedal connections: in iRacing, you set up your view and pedals separately.
If you’re practising repeated throttle and brake inputs, first check whether the pedals and seat stay in place as you brake.
If you want to connect new pedals, check that they’re compatible with your PC or specific wheel base. A PC USB connection alone doesn’t guarantee console compatibility.
If you can mount the pedals securely, adjustable brake resistance and pedal position may be useful features for repeated practice laps.
First, check that the pedals and seat will stay stable under your hardest intended braking, and find out how the set connects to your PC or wheel base. Then compare the brake sensor, number of pedals and any upgrades you have planned.
| Buying consideration | What to check | Who should pay particular attention? |
|---|---|---|
| Throttle control on corner exit | Check pedal spacing, pedal plate height and your seating position. | If I want to apply the throttle smoothly on corner exit, the pedal needs to suit my seating and foot position. Around 28% of consumers put throttle control first. |
| Consistent, controlled braking | Compare the brake sensor type, resistance adjustment and calibration for the exact model. | If I want to practise braking at the same point over repeated laps, choosing the right brake sensor is key. Around 22% of consumers prioritise brake control. |
| Stability | Check the floor space, available support or rig mounting options, and whether the seat moves when you brake. | If the seat or pedals shift when I press them, it’s difficult to practise my inputs from the same position. Around 22% of consumers put stability first. |
| Connection to existing hardware | Check the platform, exact wheel base, pedal version and any cables or adapters required as a complete setup. | If I want to keep using my existing wheel or platform, the specific connection method needs to be compatible. Around 17% of consumers focus mainly on connection compatibility. |
| What’s included and upgrade options | Check which pedals are included and whether planned clutch or brake modules are compatible. | If I might want to upgrade later, I need to know which parts work with the version I choose. Around 11% of consumers prioritise what’s included and upgrade options. |
For the Heusinkveld Sprint, the manufacturer distinguishes between a sensor load of 120 kg and a maximum actual braking force of 65 kg. These figures describe different things and aren’t a comparative test.
Compare the sensor rating, adjustable resistance and mounting requirements separately.
The Fanatec CSL Pedals and Thrustmaster T-LCM use different connection methods. A USB connection to a PC doesn’t, by itself, tell you whether a particular console is supported.
Check the pedal model, platform, wheel base and any required parts as one complete connection chain.
Depending on the model, you may also need a separately available adapter or a compatible wheel base.
You need to be able to apply your intended braking force without the seat or pedals slipping. Heusinkveld specifies that the Sprint must be mounted to a full-frame rig.
Check your planned seat and pedal positions under the hardest braking you expect to use.
Depending on your setup, suitable support or secure mounting may also be needed.
MOZA excludes certain SR-P-Lite parts from use with the SR-P. For the Fanatec CSL Pedals, the load cell kit and other upgrade parts aren’t automatically included with the base set.
Check the full model name and what’s included against the compatibility of the accessories you want.
Choosing an incompatible module may mean you have to buy a replacement.
According to Fanatec, the CSL pedal family includes a base set with a position-based brake, as well as versions and upgrades with a load cell.
According to MOZA, the SR-P two-pedal set combines a PC USB connection with a load-cell and angle-sensor brake.
The T-LCM is a three-pedal load-cell set with springs for adjusting brake resistance.
According to Heusinkveld, the Sprint two-pedal sets are designed for a permanently mounted PC setup, with mechanical and software adjustments.
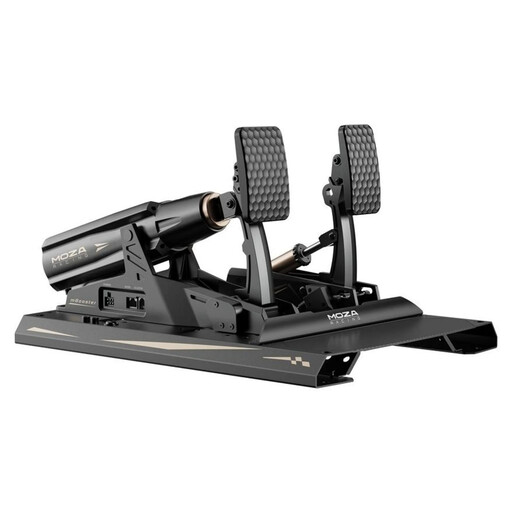
This selection features a three-pedal MOZA set with a load-cell brake, designed for mounting to a rig.
 No image available
For drivers looking for a pressure-sensitive brake and an adjustable throttle position; this set is designed to be mounted securely to a sim racing rig.
The description lists three pedals, a load-cell and angle-sensor brake, and an adjustable throttle spring. The pedal angle and height of the pedal plates can be adjusted.
The product name lists USB Type-A to USB Type-B as well as USB Type-C. Before buying, check which connection method suits your platform and setup. The mBooster is powered by the supplied 48-V power adapter.
There’s no one-size-fits-all answer. First check which inputs the car you’re driving requires, and whether you can operate the throttle and brake from a stable seating position. The available sets vary in the number of pedals and how they measure braking; manufacturer specifications don’t guarantee faster lap times.
Connect the pedals, let the game detect the controls and calibrate them. For the load-cell examples listed, iRacing Support recommends a Brake Force Factor of 0.00. For the position-based examples listed, it recommends a value between 1.60 and 2.00. This is a recommendation for iRacing, not a setting for other simulators.
The documented connection requirements don’t indicate any special pedal requirements for a single-monitor setup. If you use iRacing, its guide recommends measuring the shortest distance between your eyes and the monitor surface when setting up your view. Pedal connection and calibration are separate setup steps.
Check whether you’ll also need an adapter, load cell kit, clutch or suitable mounting. For an online purchase covered by EU consumer rules, there’s generally a 14-day withdrawal period; Your Europe lists this period and notes that exceptions may apply. The Verbraucherzentrale also distinguishes between statutory consumer rights and a voluntary guarantee.
These pedals are input devices for racing simulators. The product information referenced here doesn’t show that they’re approved as vehicle pedals; this buying guide covers simulator use only.