Teachers demonstrating detailed techniques
If you film your hands and the clay from close up or overhead, the light should be adjustable so that your hands and tools don’t obscure the area you’re working on.


Choose a light that you can position outside the camera frame and diffuse when needed, so your hands and the shape of the clay remain clear in a test recording. Two independently adjustable light sources give you more control over shadows cast by your hands. A clamp-mounted panel can save desk space, while a COB light requires you to choose a light modifier separately. Check the colour temperature, power supply and what’s included, then test the setup with your camera and the room lighting you already have.
If you film your hands and the clay from close up or overhead, the light should be adjustable so that your hands and tools don’t obscure the area you’re working on.
If space is limited, check that a table clamp, the height of the light and the camera position will all work with your table.
If you film clay or coloured techniques under room lighting, you should be able to adjust the colour of the light and your camera so that the results look consistent from one recording to the next.
| Buying priority | What to check | Who is it important to? |
|---|---|---|
| Clearly visible hand movements and details of the shape | Film the work surface from the camera’s viewpoint; check the position and diffusion of the light. | If I need to show both hand movements and the edges of the clay, I check both in a test recording. Around 33% of consumers put clearly visible steps first. |
| Consistent colours across clay and materials | Match the light’s colour temperature to the room lighting and check the white balance in a test recording. | If I want the colours of the clay and materials to look consistent across several recordings, I adjust the light and camera together. Around 27% of consumers prioritise colour consistency. |
| Mounting that doesn’t take up workspace | Measure the edge of the table and the available space; check that the mount and camera angle work together. | If there’s little room left on my table, the mount needs to keep the work surface clear without getting in the way of the camera position. Around 20% of consumers focus on space and mounting. |
| Recording with fewer interruptions | Check what power supply is included and record a longer test clip using your planned camera settings. | If I want to record a longer lesson, I want to check the power supply and footage for interruptions or flicker. Around 20% of consumers prioritise uninterrupted recording. |
Distance, reflector and softbox all affect how the light reaches your work surface. A quoted measurement won’t necessarily reflect the finished image with your setup.
Only compare figures taken under the same conditions, and film both the centre and the edges of your work surface.
What’s included varies by model and version. Before ordering, check the packing list and the connections for the specific listing.
Depending on your setup, you may also need a suitable light modifier, a stand, NP-F batteries or a USB-C power adapter with sufficient output.
Different light sources can make it harder to set the white balance. Artificial lighting can also cause flicker or banding in your footage.
Record a test clip with your usual room lighting and check the colours and footage for flicker before filming a longer lesson.
The Bi-Color 660 two-light kit with softboxes is designed for a setup where the key light and fill light can be positioned separately.
The Key Light Air MK.2 with table clamp is worth considering if the table edge, light height and camera angle suit your setup.
The 100x S is a bi-colour COB continuous light for a setup using a Bowens light modifier selected separately.
The SL60IIBi has a Bowens mount, making it an option if a separate COB light suits the lighting setup you have in mind.
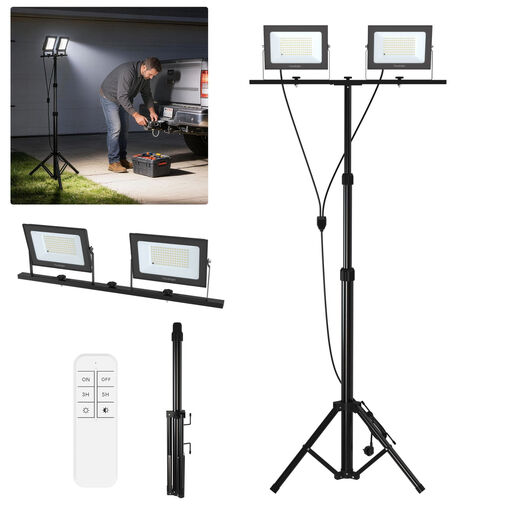
This selection includes a dimmable LED work-light set for illuminating your modelling workspace. Check how it looks with your camera and the room lighting you already have.
 No image available
The two independently adjustable, dimmable lights can be positioned to illuminate your hands and work surface.
According to the product description, the stand adjusts from 100–165 cm in height. A remote control and dimming function are also listed.
Not necessarily. Start by pointing a key light at the area you’re working on, then check the camera image to see whether your hand is obscuring it. A second light can brighten darker areas; just make sure the edges of the shape are still clear.
Adjust the colour of the light to suit your recording setup and check the white balance with a test recording. A quoted colour-rendering figure alone can’t guarantee consistent colour; you need to test the camera and light together.
Flicker or banding can be caused by the combination of room lights, video light and camera settings. Sony describes these kinds of image changes when filming under LED and other artificial light sources. Test the full setup with the settings you plan to use for your lesson.
For the specific version, check whether a stand, softbox, battery and power adapter with sufficient output are included. When buying from a business seller in the EU, you’re generally entitled to a minimum two-year legal guarantee from the seller. An additional manufacturer’s warranty doesn’t replace this.
Check the markings, product documentation and assembly instructions for the specific device being offered. The German Federal Network Agency lists CE marking, manufacturer details and the required German-language instructions and safety warnings among the aspects it monitors. The CE mark is the manufacturer’s declaration of conformity; it isn’t independent confirmation that the light can be safely mounted in your setup.